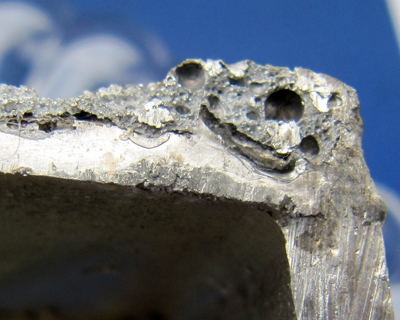
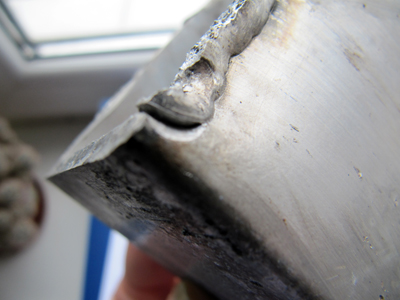
Visual and measuring control (incoming control, drawing up a protocol on the suitability of the product)
Services
- Visual measuring control
- Visual measuring control of pipelines
Visual and measuring control is carried out with the naked eye and (or) using visual-optical devices up to 20-fold magnification (loupes, microscopes, endoscopes, mirrors, etc.). When controlling the material and welded joints (surfacing) in the manufacture (construction, installation, repair and reconstruction) of technical devices and structures, magnifiers with a 2-7-fold increase are used, and when assessing the state of technical devices and structures during their operation, magnifiers up to 20 -fold increase.
Visual and measurement control is carried out before the control of materials and welded joints (surfacing) by other methods of non-destructive testing, as well as after the elimination of defects.


Preparation of the object for visual and measuring control:
When inspecting painted objects, paint is not removed from the surface in the inspection zone, unless it is specifically stipulated in the RD and the surface of the object does not cause suspicion of cracks based on the results of visual inspection.
Cleaning of the controlled surface is carried out by the method specified in the relevant normative documents (for example, washing, mechanical cleaning, wiping, blowing with compressed air, etc.). In this case, the wall thickness of the controlled product should not decrease beyond the minus tolerances and there should not be unacceptable, according to RD, defects (risks, scratches, etc.).
If necessary, surface preparation should be carried out with a non-sparking tool.
The roughness of surfaces of parts cleaned under control, welded joints, as well as the surface of cutting edges of parts (assembly units, products) prepared for welding, should be no more than Ra 12.5 (Rz 80).
The surface roughness of products and welded joints for subsequent non-destructive testing methods depends on the testing method and should not exceed:
Ra 3.2 (Rz 20) – with capillary control;
Ra 10 (Rz 63) – with magnetic particle control;
Ra 6.3 (Rz 40) – with ultrasonic testing.
For other methods of non-destructive testing, the roughness of the controlled surfaces of products is not regulated and is established by the PDD or production and design documentation (PKD).
Permissible measurement error during measurement control
| Measured value range, mm | Measurement error, mm |
| Up to 0.5 incl. | 0.1 |
| Over 0.5 to 1.0 incl. | 0.2 |
| ” 1,0 ” 1,5 “ | 0.3 |
| ” 1,5 ” 2,5 “ | 0.4 |
| ” 2,5 ” 4,0 “ | 0.5 |
| ” 4,0 ” 6,0 “ | 0.6 |
| ” 6,0 ” 10,0 “ | 0.8 |
| ” 10,0 | 1.0 |